Wordpress Add Posts To Page

How to Add Posts to a Page in WordPress
In WordPress, all the posts you publish are displayed on the homepage or a dedicated blog page by default. But what can you do if you want to display your posts on a different page? In this guide, we will show you how you can add posts to a page in WordPress.
Why Add Posts to a Page in WordPress?
Learning how to add posts to any page in WordPress is very useful if you want to customize your site. Even if you run a site that doesn't have a very active blog, at some point you will probably publish posts with news about your product, new releases, updates, and so on. By default, all the posts will appear on your home page or a dedicated blog page. But you can change that and add your posts to some other pages to promote them and reach more users.
Additionally, you could create different pages to showcase the posts from different authors, topics, or categories.
Now that we better understand when adding posts to a page in WordPress can be a good idea, let's see how to do it.
Index
In this guide, we'll have a look at how to:
- Add posts to a page
- Add a list of posts to a page
- From the WordPress dashboard
- With plugins
- Customize the Posts page
- With WordPress page builder
- From the theme's options
- With a plugin
- Add posts to the sidebar
- With widgets
- Using WordPress Customizer
1) How to Add Posts to a Page in WordPress
By default, WordPress will list all your posts on your home page which isn't ideal. However, you can set up a custom post page and publish all your posts on a dedicated page. In this section, we will show you how to add your posts on a dedicated page in WordPress.
1.1) Configuring Custom Home and Blog Pages
First, you need to create two pages: one for your homepage and one for your blog.
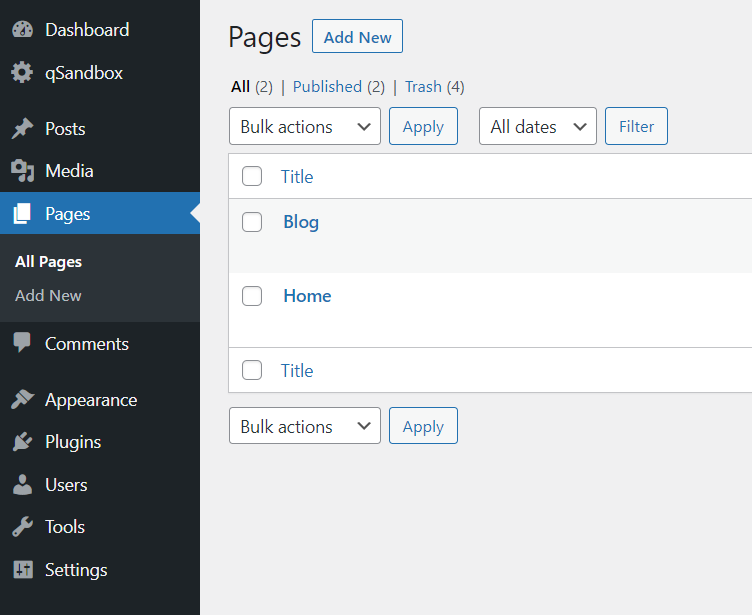
Once you publish those pages, go to Settings > Reading.
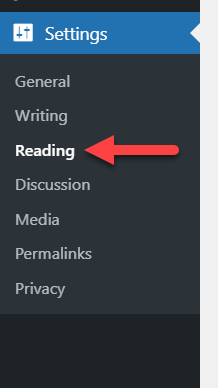
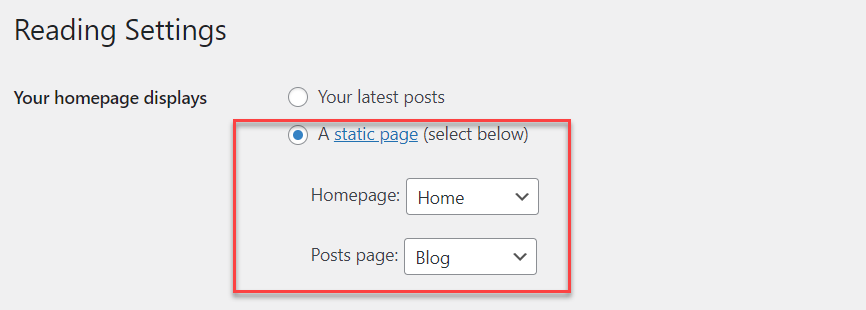
There, you will be able to change both your home and blog pages. Here, you will see two main options to display on your homepage:
- Your latest posts
- A static page
Select the second option and select the correct pages for both your homepage and posts page as shown below.
Then update the settings and if you check your site from the frontend, you will see an empty page with your title and blank spaces. To design a custom homepage, you should use a page builder such as Elementor, Beaver Builder, WPBakery Visual Composer, or any other.
On top of that, in the top right corner, you will see a link to your blog page where you will display all your blog posts. You can also add the page to your menu for easy access.
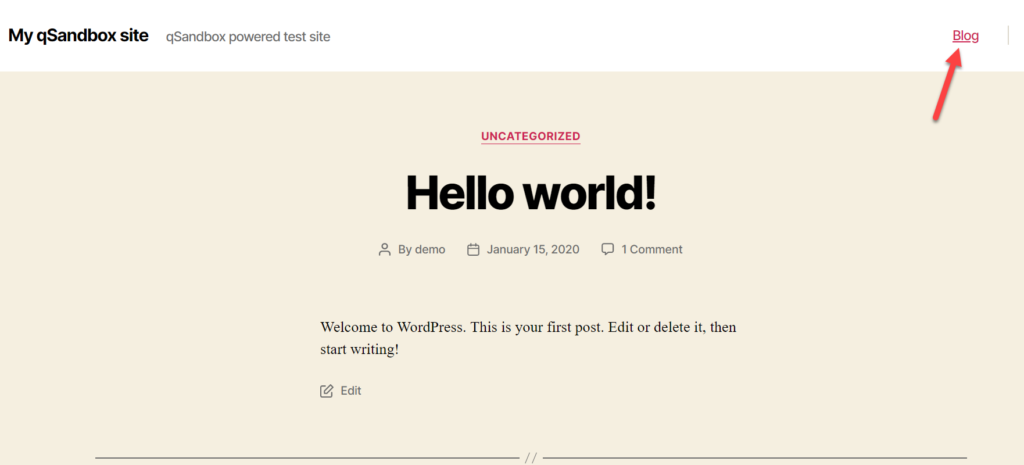
That's it! This is how you can add a custom blog page to your WordPress website.
2) How to Add a List of Posts to Any Page
If you want to promote your blog posts and give them more visibility, you can also display them on a custom page. There are two main ways to do that:
- Using Gutenberg editor
- With a plugin
2.1) Using Gutenberg Editor
Using the Gutenberg editor and a block, you can list your posts on any page. To do that, first, create a new page and search for the Latest Posts block.
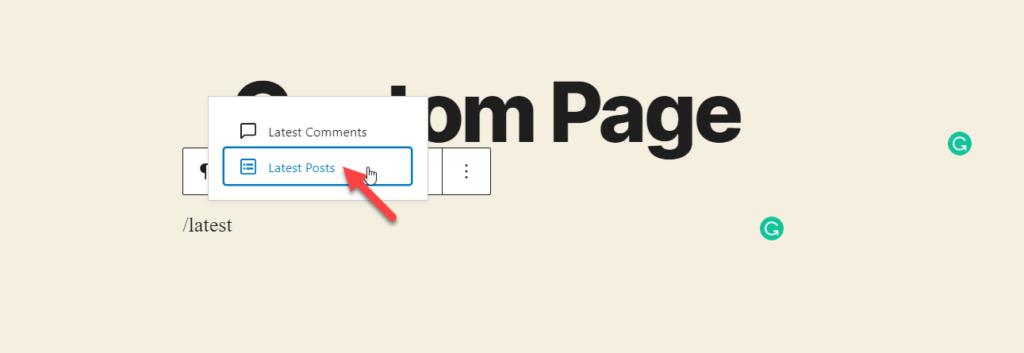
Gutenberg will fetch all your published posts and display them in the editor.
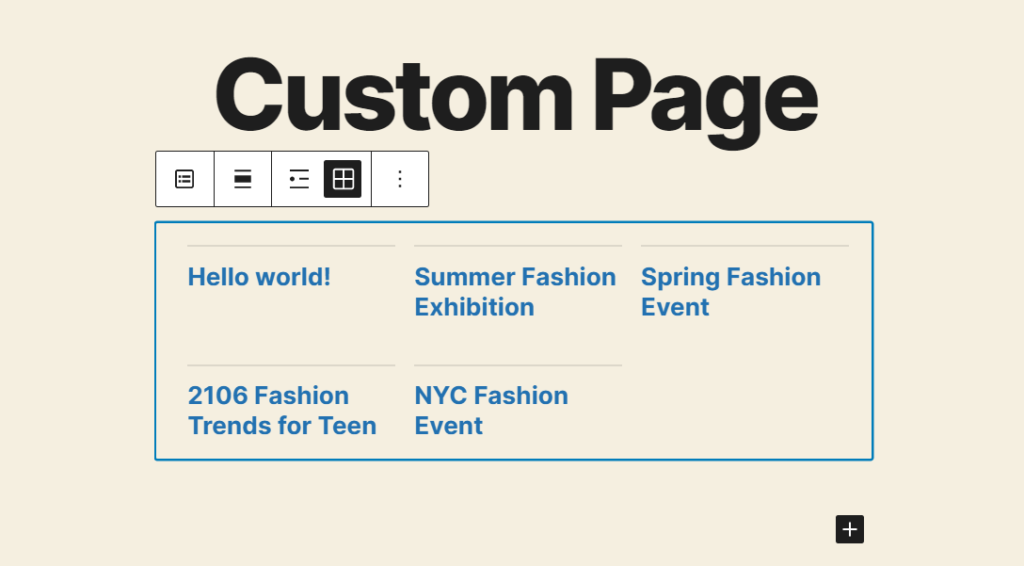
You can customize the block by configuring the alignment and the type of view. If you want to edit the block further, check out the customization options on the right panel.
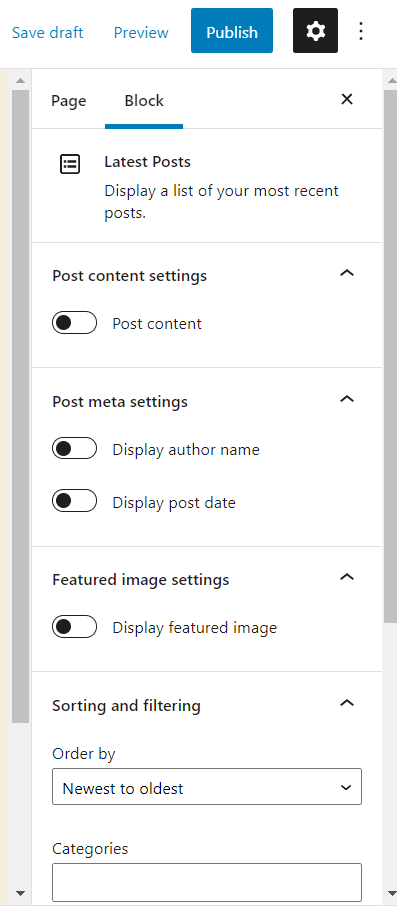
Once you finish configuring the block, publish (or update) the page.
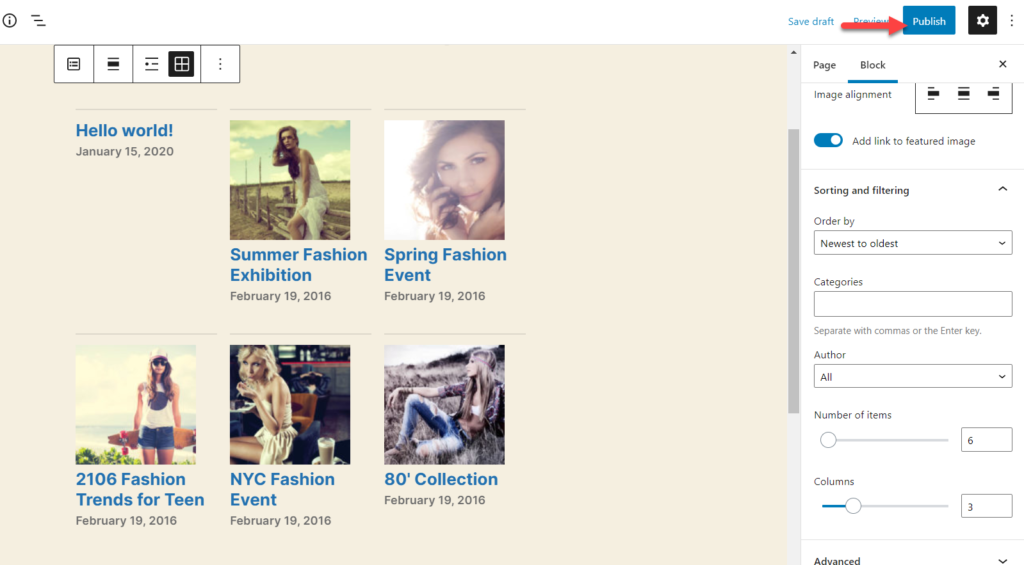
If you check the page from the frontend, you will see the recent posts block with your content.

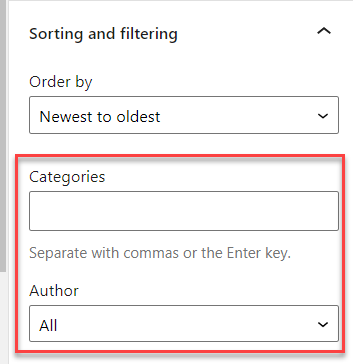
This way, you can add your recent posts to any WordPress page. One advantage of this method is that you can also filter the posts for categories and authors.
 But what if you don't use Gutenberg? You'll need to use a plugin.
2.2) Using a Dedicated Plugin
If you're still using the Classic Editor on your website and prefer not to use Gutenberg, the above method will not work for you. If that's your case, you'll need to use a dedicated plugin.
There are several tools out there, but in our experience, WP Show Posts is the best tool for this task.
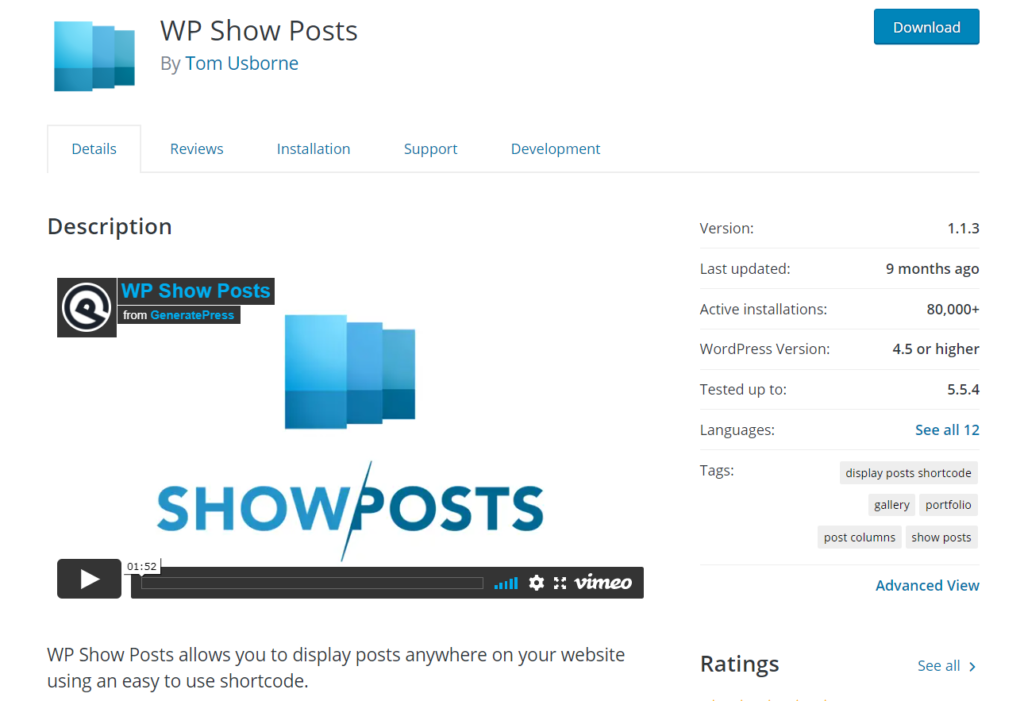
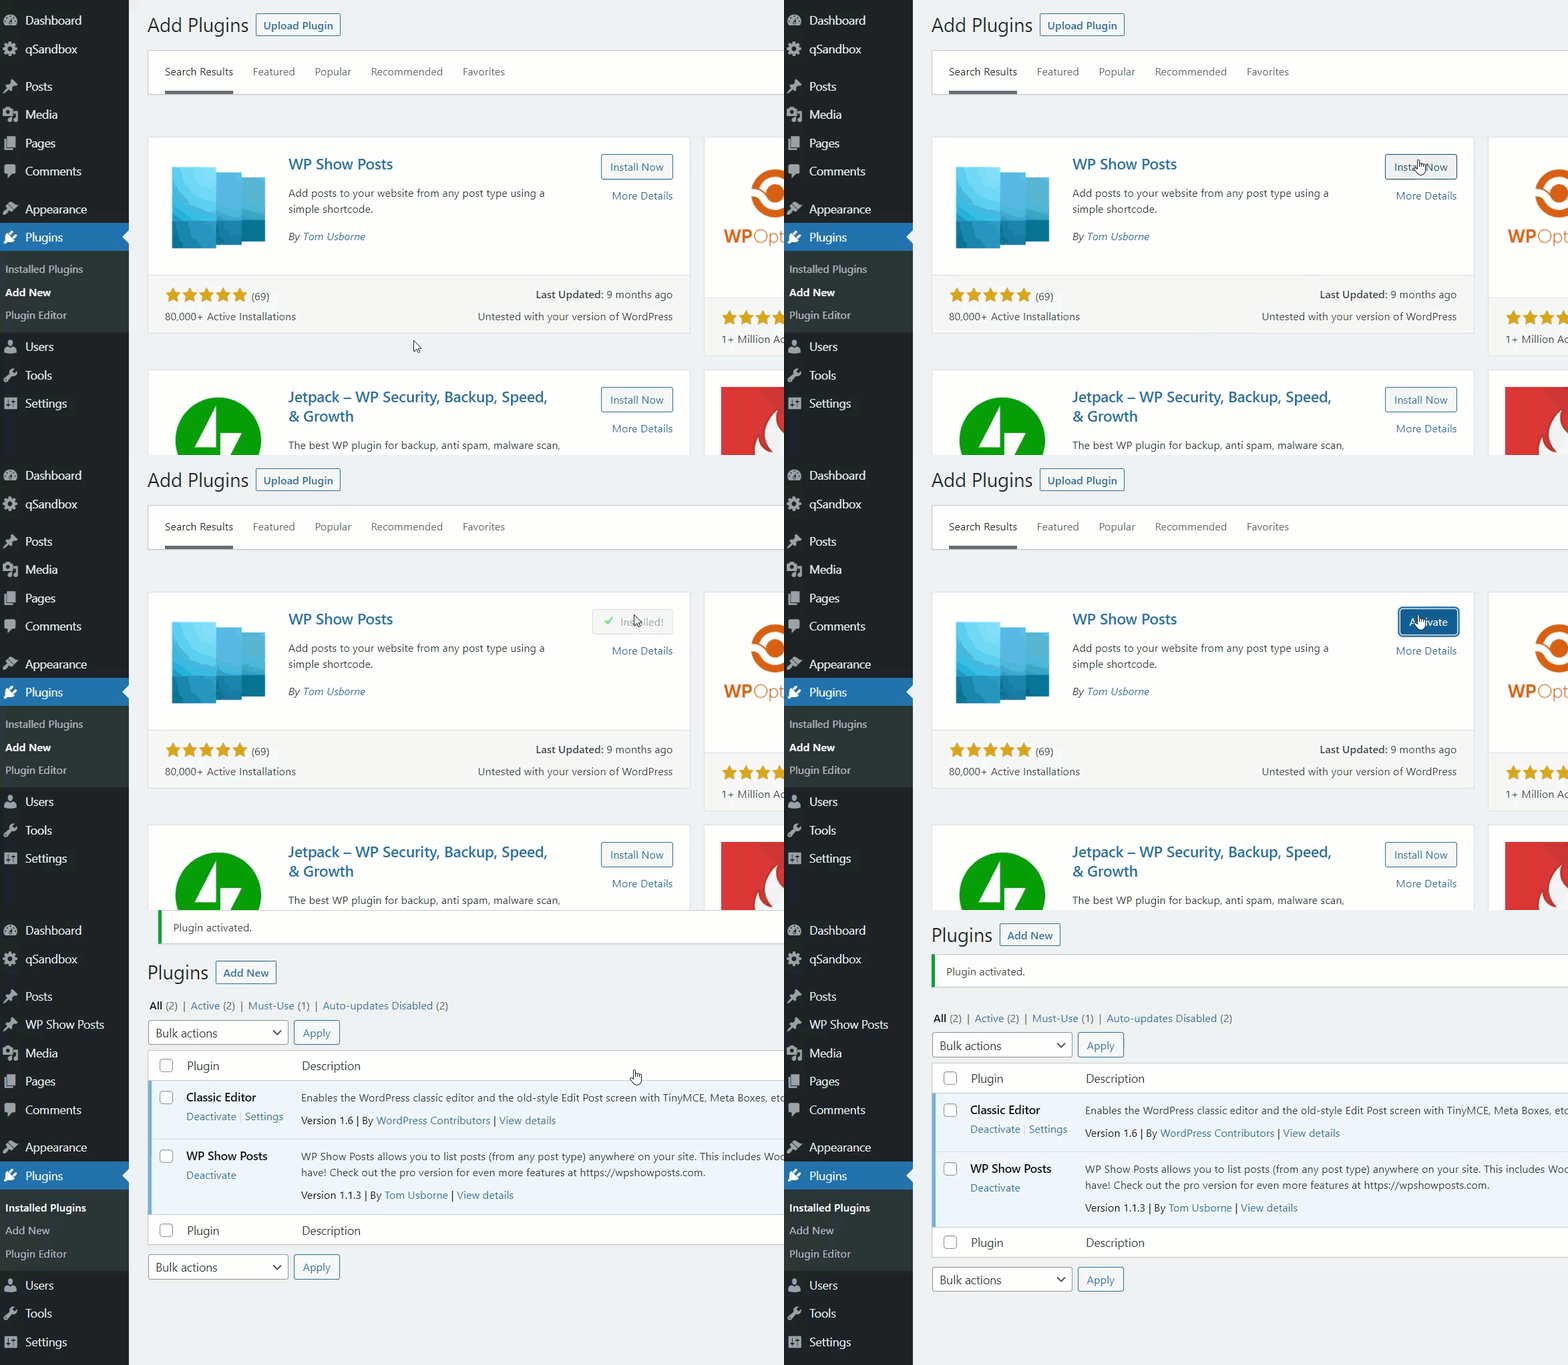
First, install and activate the plugin on your website. In your WordPress dashboard, go to Plugins > Add New, look for the plugin and install it on your site.
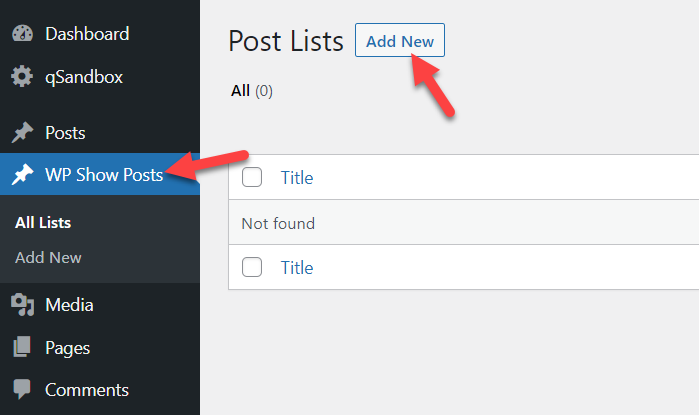
After that, you will see the plugin's settings on the left-hand side. Go to WP Show Posts and press Add New to create a new post list.
You'll need to give a name to your post list and you will see some extra customization options such as:
- Posts
- Columns
- Images
- Content
- Meta
- More settings
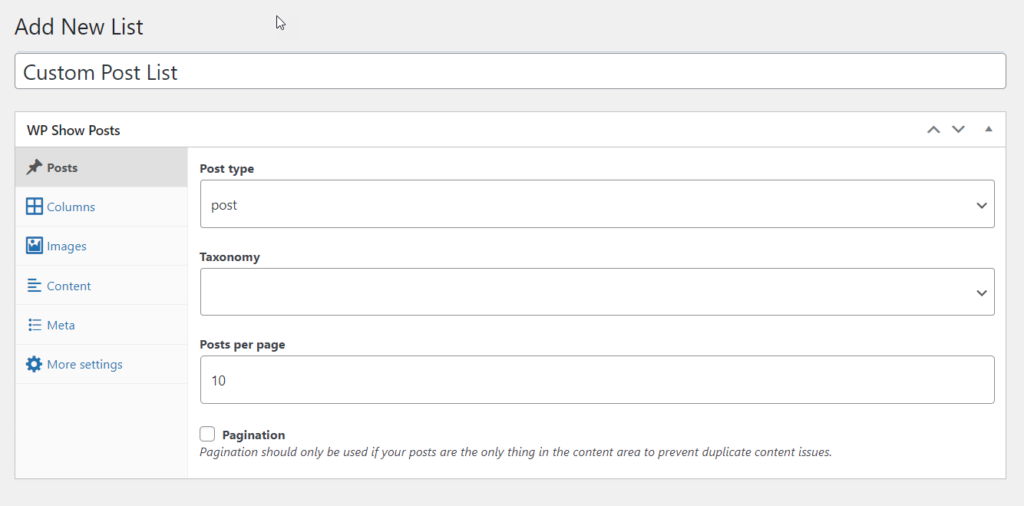
After configuring the post list, publish it. You will see a unique shortcode and PHP code on the right side that you can use to add the posts to any page on your WordPress site.
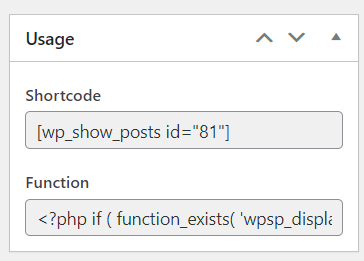
You can add the shortcode anywhere, or use the PHP function to edit your theme's templates.
For this demonstration, we are going to use the shortcode, so simply copy the shortcode and paste it on any page that you want.
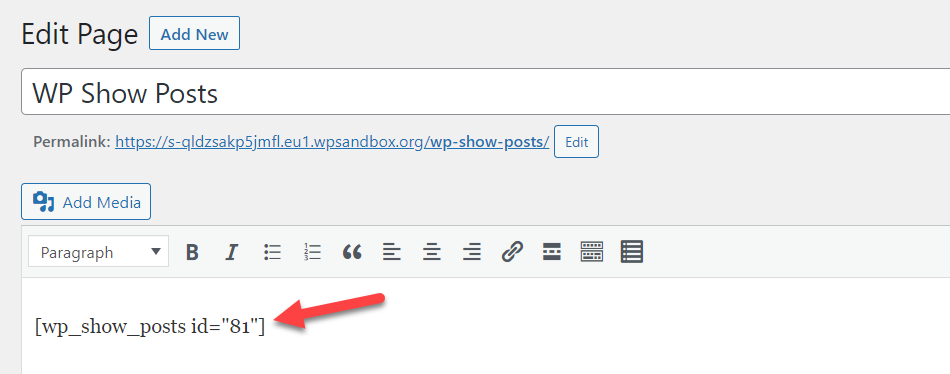
Then publish/update the page and you will see the posts on the frontend. If you're not happy with the way it looks, simply go back to the customization options and edit it.

3) How to Customize Your Posts Page in WordPress
Now that you have created your posts page, it's time to customize it. To do this, there are a few options:
- Use a page builder
- Use the theme builder
- With a plugin
Let's have a look at each method.
3.1) Using a WordPress Page Builder
WordPress page builder plugins are an easy way to create custom pages and design posts pages. There are several tools you can use. In this section, we will teach you how to design a posts page using Elementor.
NOTE: We already have Elementor installed on our site. If that's not your case, make sure you install Elementor before continuing.
First, open your blog posts page and you will see a button called Edit With Elementor.
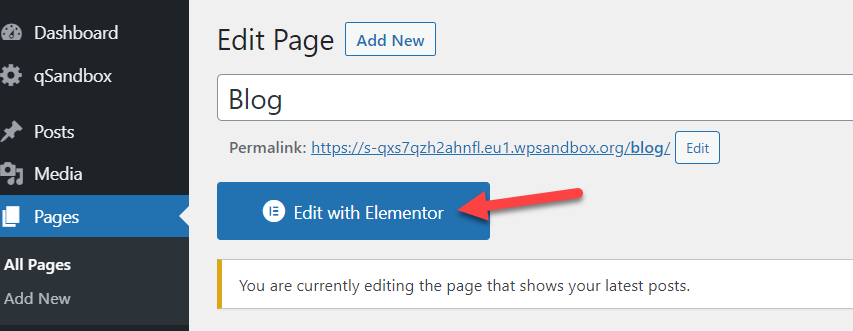
Click it and you will land on a dedicated section where you can manage the page design. On the left-hand side, you will see all the available elements you can use. Simply drag and drop them in your pages to start customizing them. Once you're happy with your page, simply save the changes.
For more information on how to customize your site with Elementor, have a look at these guides:
- How to Customize the Shop Page with Elementor
- Create a Megamenu with Elementor
- How to customize the Product Page with Elementor
3.2) Theme Specific Customization
Another alternative to customize post pages is to use the options that themes include by default. Some themes such as GeneratePress, Astra, Newspaper, or Avada come with in-built blog page editing features. So you can edit the layout of your blog page without using any third-party plugins.
For this demonstration, we will use the GeneratePress premium theme.
In your WordPress dashboard, go to Appearance > GeneratePress and enable the options you want to activate to start customizing your blog page.
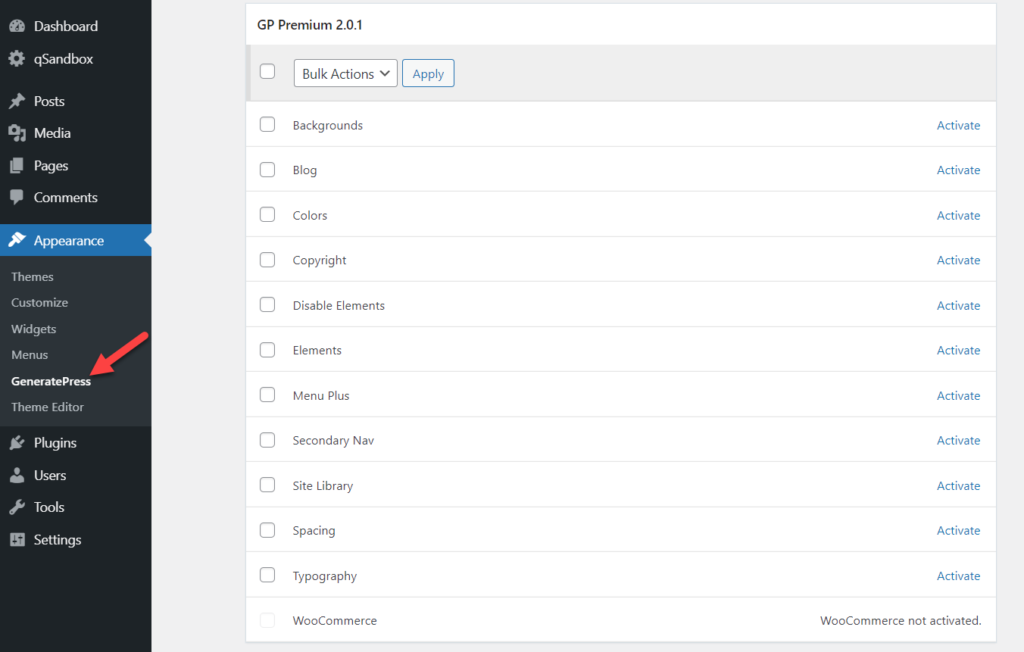
After that, open the WordPress Customizer from Appearance > Customize. Under Layout > Blog, you will see all the available customization options.
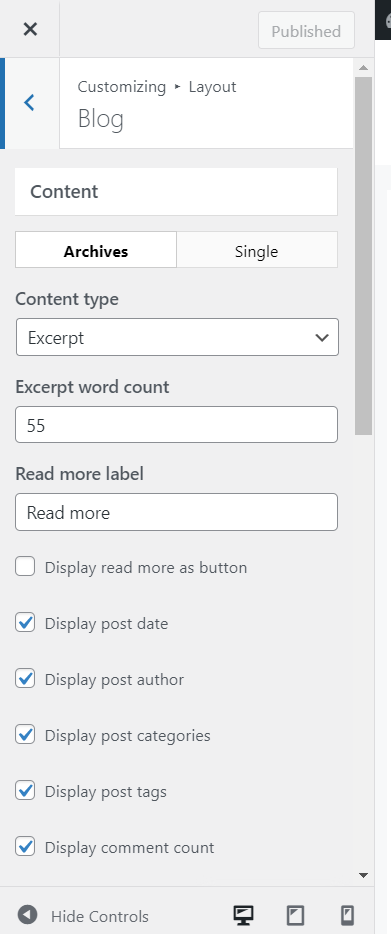
From there, you can configure both your archive layout single post layout options.
The main configuration options you can edit on this screen are:
- Content-type
- Excerpt word count
- Read more label
- Read more button
- Published ate
- Author
- Categories
- Tags
- Comment count
- Infinite scroll
Keep in mind that these may be different depending on your theme. GeneratePress also comes with an option to display posts in columns.
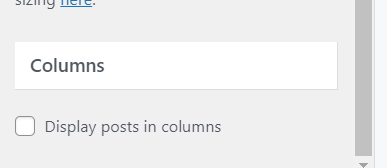
As you start playing around customizing the page, you will see that the changes reflect instantly in the live preview mode.
After you finish editing the page and are happy with the result, you may see something like this:
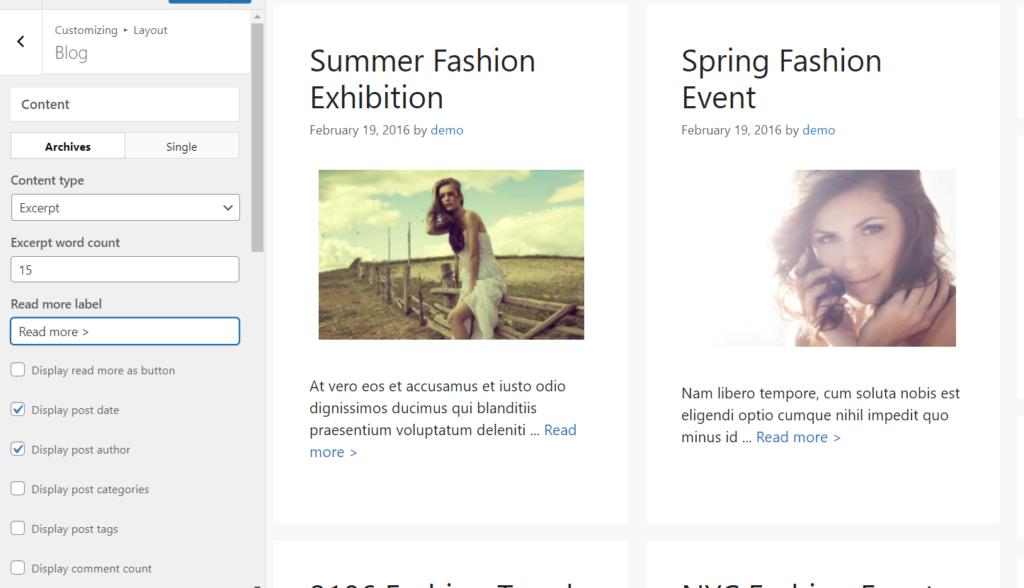
Once you're happy with your design, publish the changes and that's it. This way, you can use your theme panel to easily customize your posts page in WordPress.
3.3) Display Archives with a plugin
Another interesting alternative to customize your posts page is to display archives. If you are looking for a method to embed your archives on a page, this section is for you. For this demo, we'll use a free plugin called Compact Archives that allows you to easily display archives on your blog pages.
First, install and activate the Compact Archives on your website.
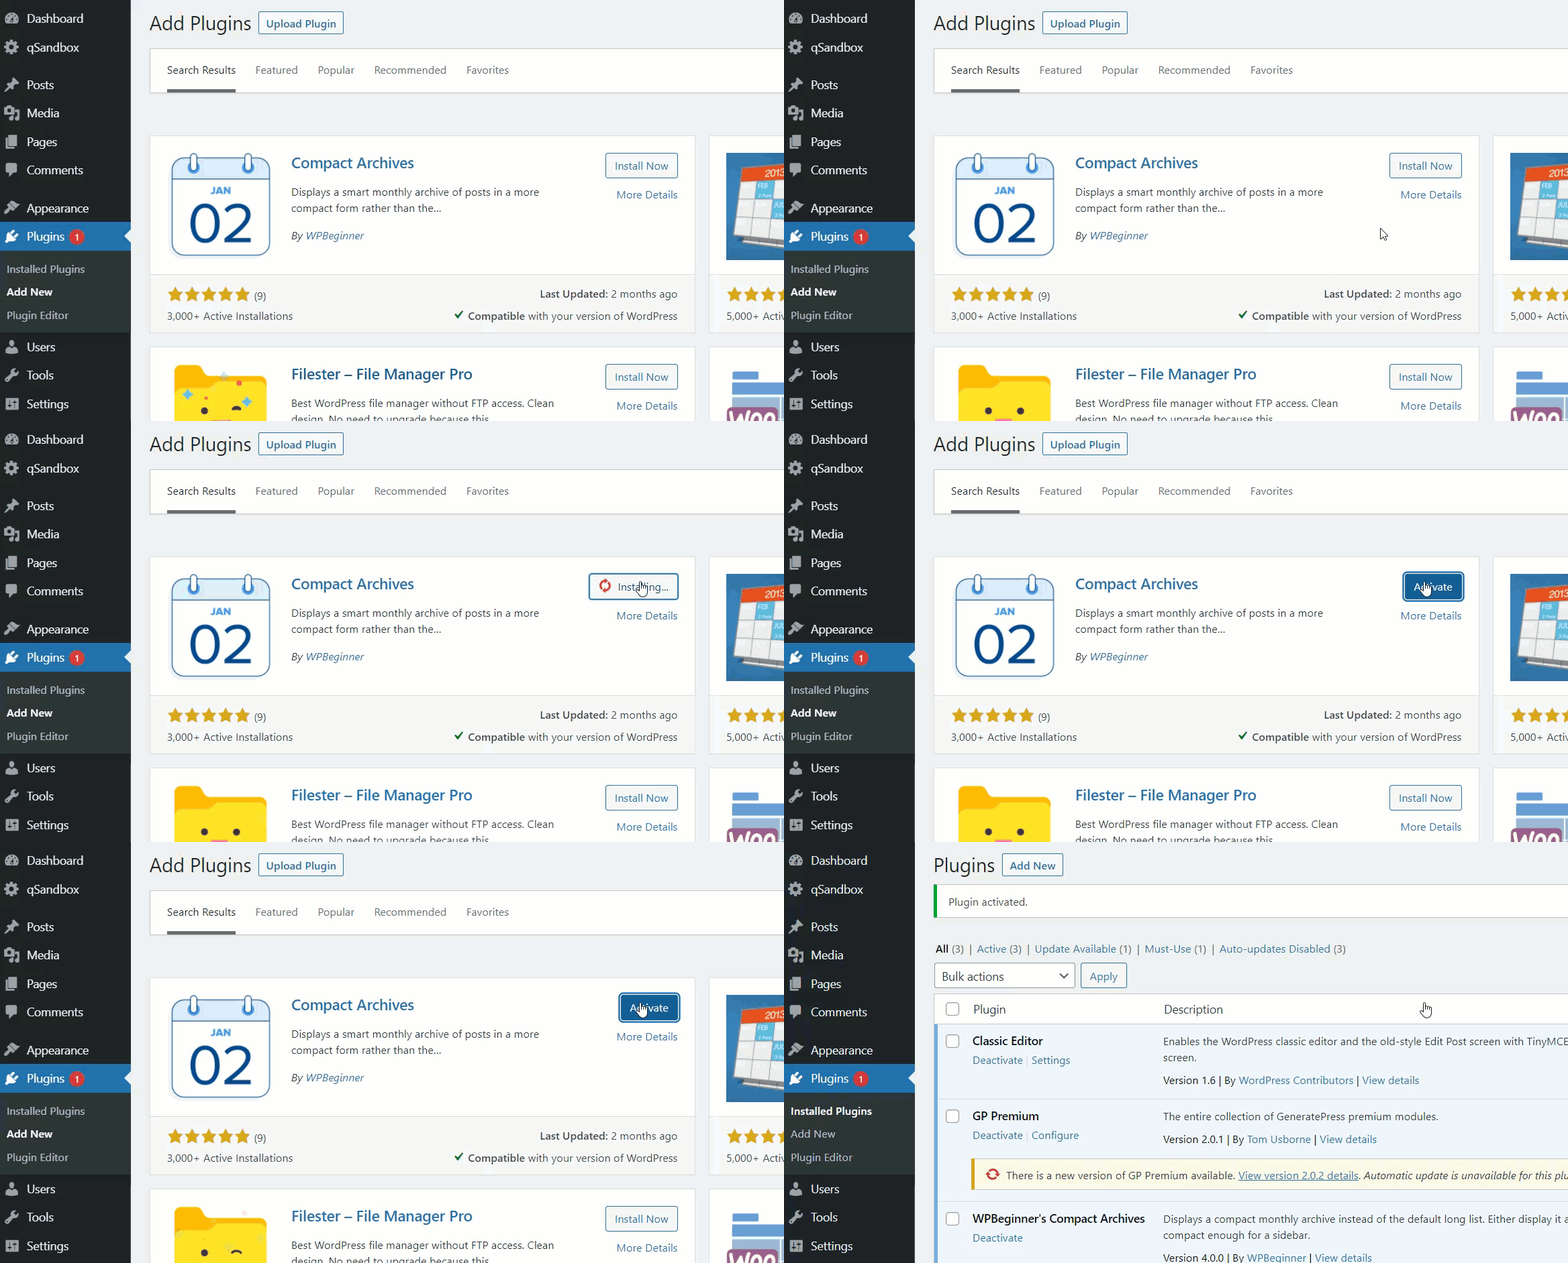
The plugin includes some shortcodes that you can use to display archives on your site.
[compact_archive]
[compact_archive style="block"]
[compact_archive style="numeric" before="<p>" after="</p>"]
For example, to add the standard shortcode, simply paste it on any page and hit Publish/Update.

If you check the site from the frontend, you will see the default archives option.
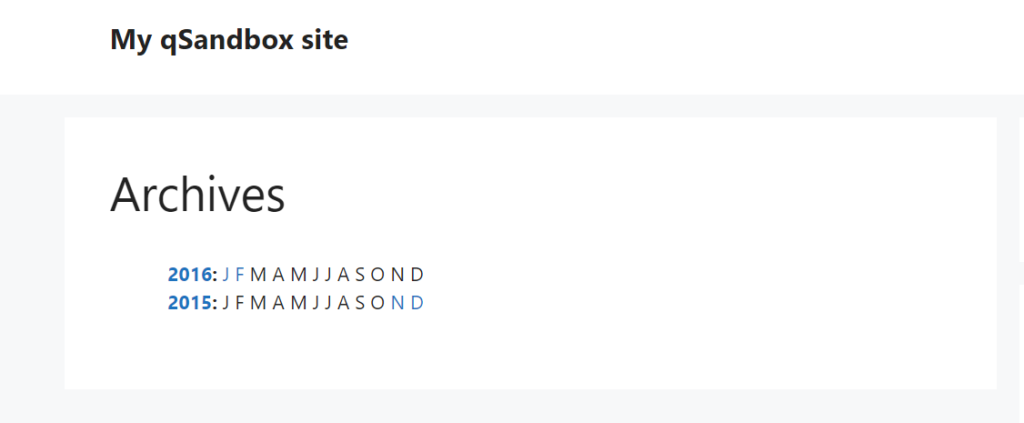
Alternatively, if you use the shortcode ([compact_archive style="block"]), you will see the archives in a block.
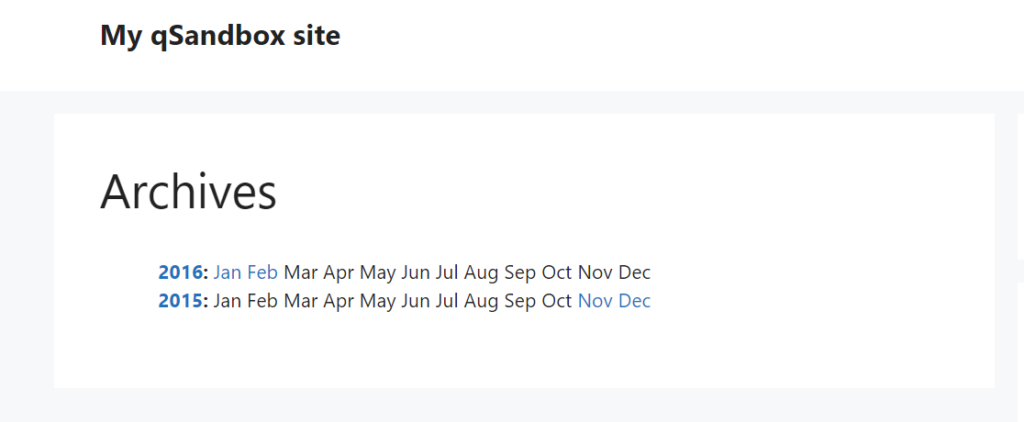
This way, you can customize the page and display your archives with shortcodes.
On the other hand, if you are an advanced user and have coding skills, there are several PHP scripts available to integrate the archives with your theme files.
4) How to Add Posts to the Sidebar
So far, you've learned how to add posts to a page in WordPress as well as how to include a list of posts and customize your posts page. But there's more you can do to make sure that your visitors see your posts.
Adding posts to your sidebar is a great way to grab a user's attention. This can help you increase the overall page views and increase your visitors' time on your site. Let's see how to do it.
There are two different ways to add posts to the sidebar:
- Using widgets
- With the WordPress Customizer
Let's have a look at the step-by-step process for each option.
4.1) Using The Widgets Option
In your WordPress dashboard, go to Appearance > Widgets.

There you will see all the available widgets on the left-hand side and the widget positions on the right-hand side.
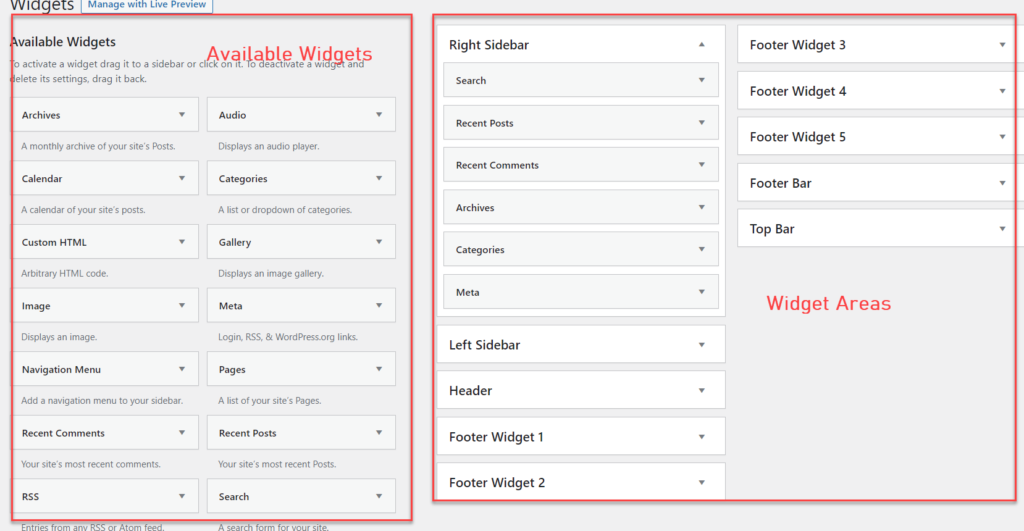
Keep in mind that the widgets and areas may vary depending on the theme you're using. In our case, we are using the GeneratePress theme that includes several unique locations to place widgets. In this section, we will add posts to the sidebar widget area.
As you can see, there are already several widgets in the sidebar.
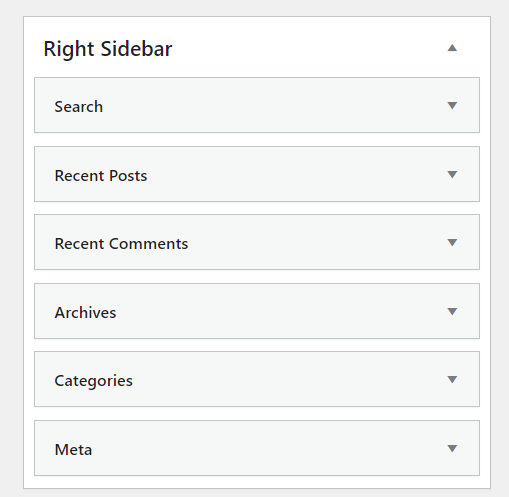
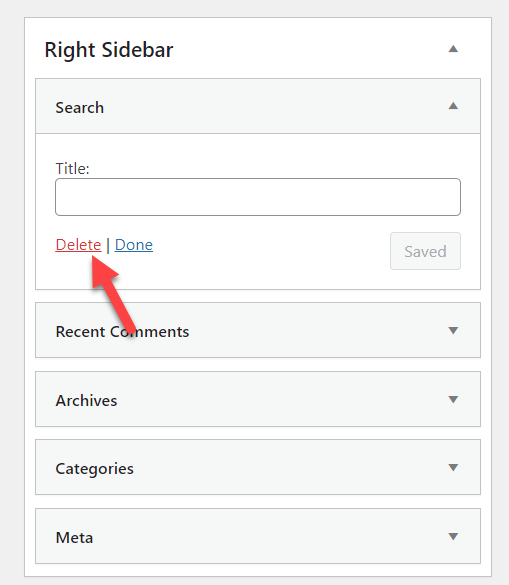
We'll remove them to have a clearer sidebar. To do that, simply expand the widgets and delete them.
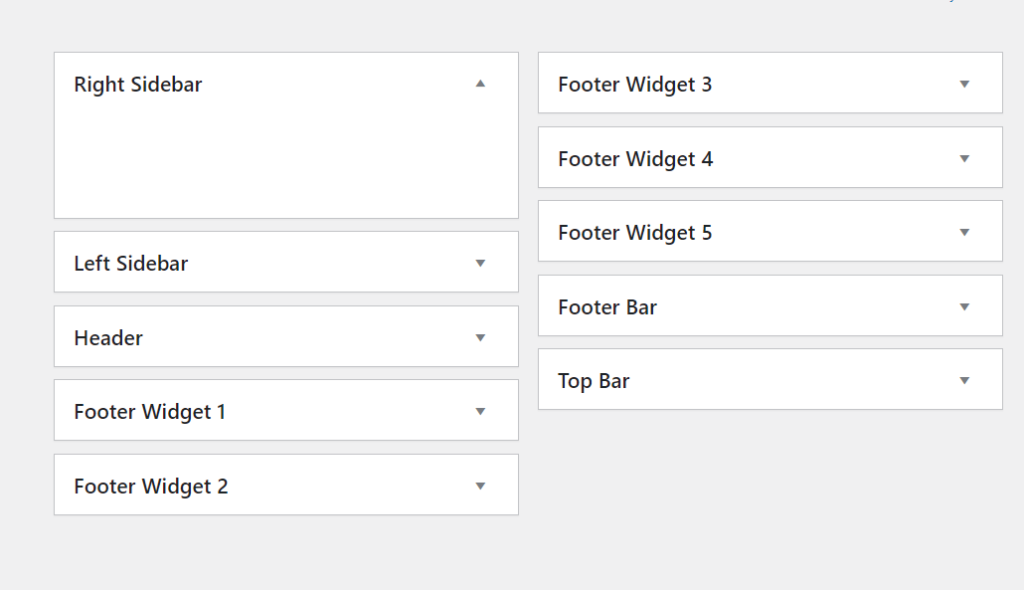
Now, we don't have any widgets in the right sidebar.
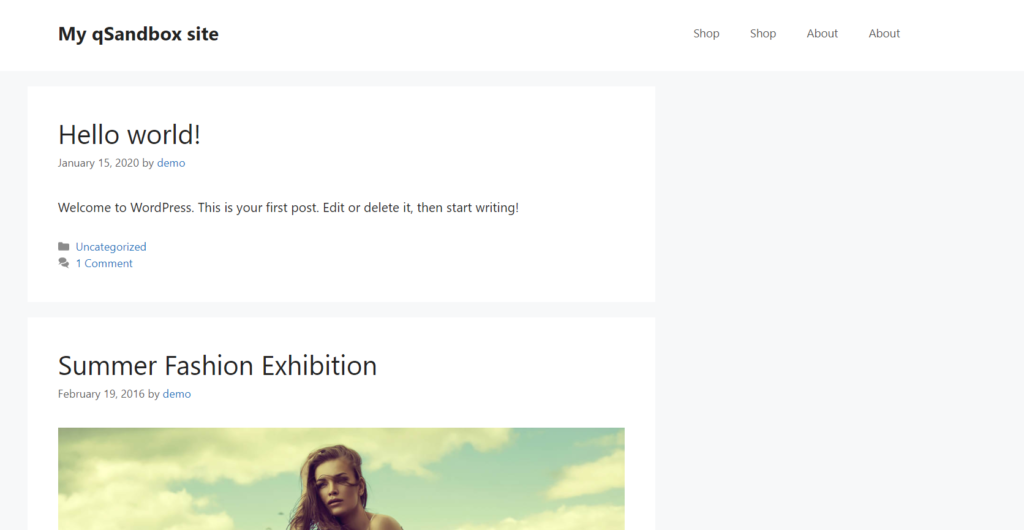
If you check the website from the front end, you will see that there aren't any widgets in the right sidebar.
Now we are ready to add the posts widget to the sidebar. On the left-hand side, you will see a widget called Recent Posts. Drag and drop it to the sidebar widget area.
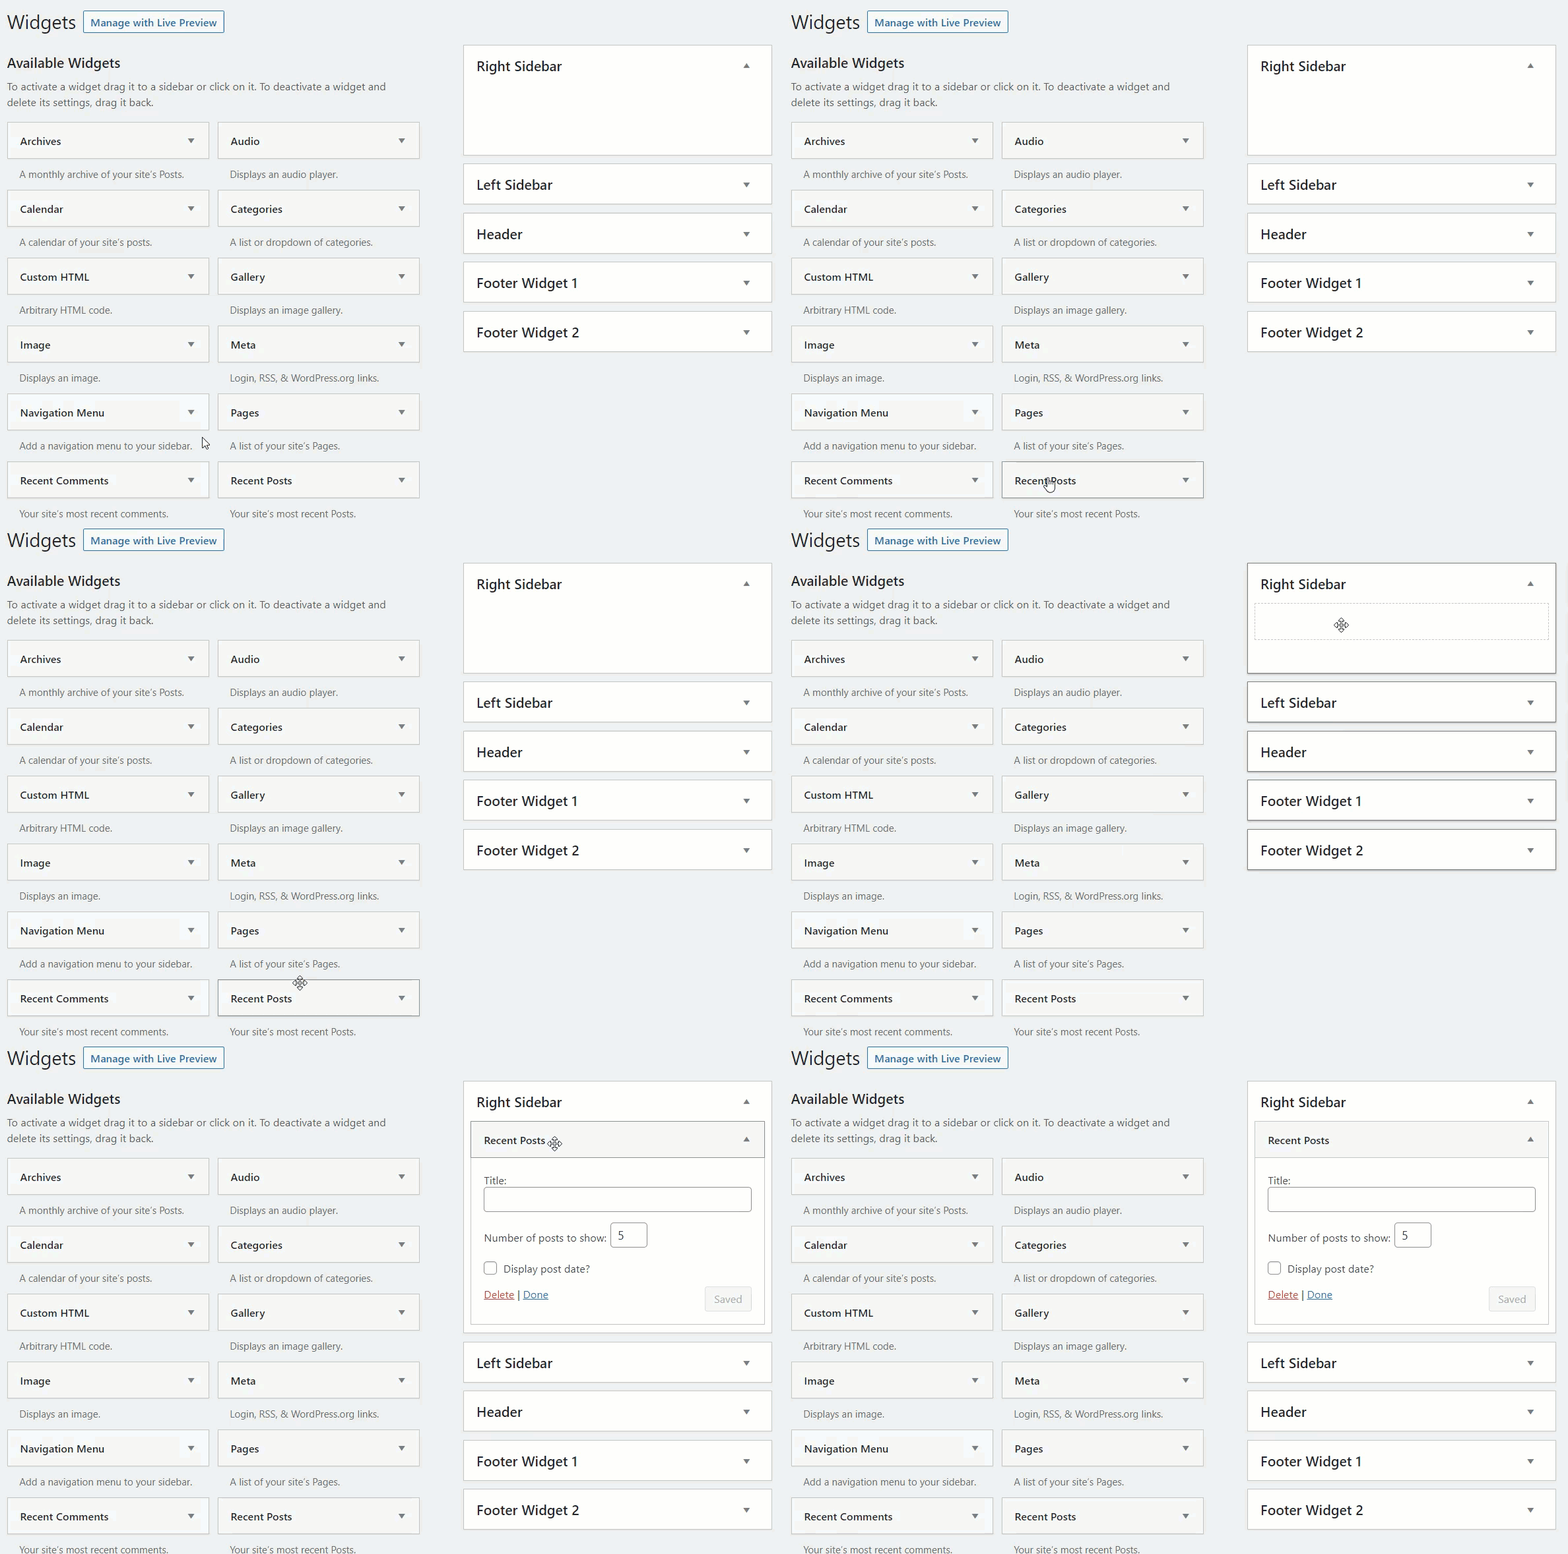
You can configure:
- Widget title
- Number of posts to show
- Show/hide post's published date
Complete each of those fields and save the changes
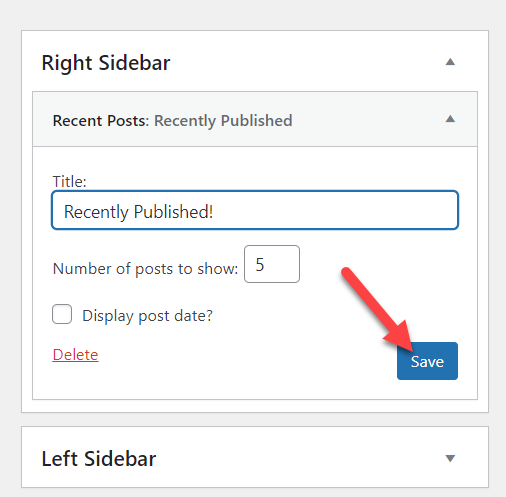
Now open the website from the frontend and you will see the sidebar widget.
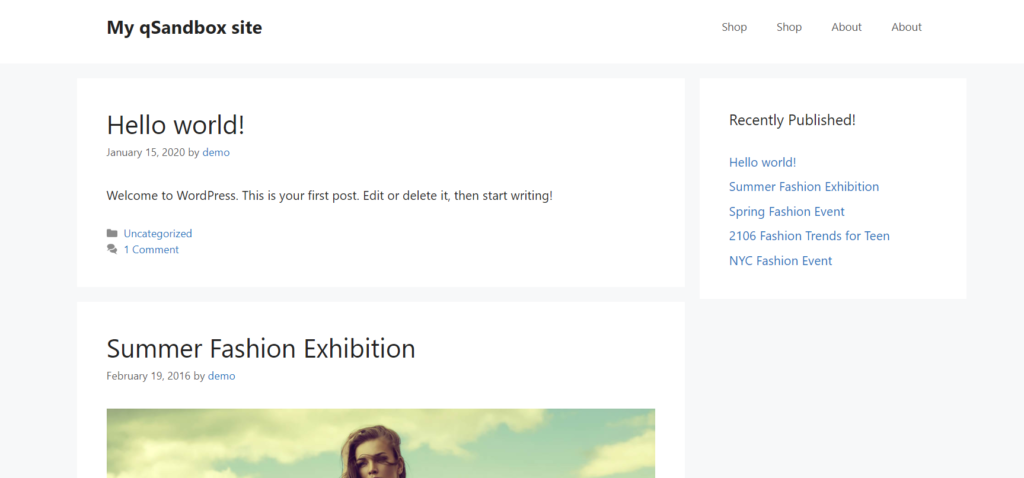
This widget will be visible on individual posts, pages, and custom post types.
That's it. This is how you can add posts to your WordPress sidebar with widgets. Let's see how to do it using the Customizer.
4.2) Using the WordPress Customizer
The main disadvantage of using the widget editor is that you need to check the frontend to see the changes every time you customize it. The WordPress Customizer solves this issue because it shows you every change in the live preview mode in real-time.
To add posts to the sidebar, go to Appearance > Customize.
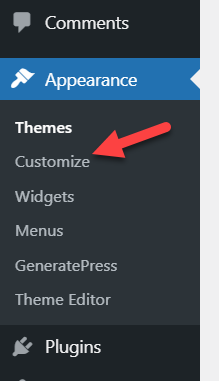
Then, open the Widgets section.
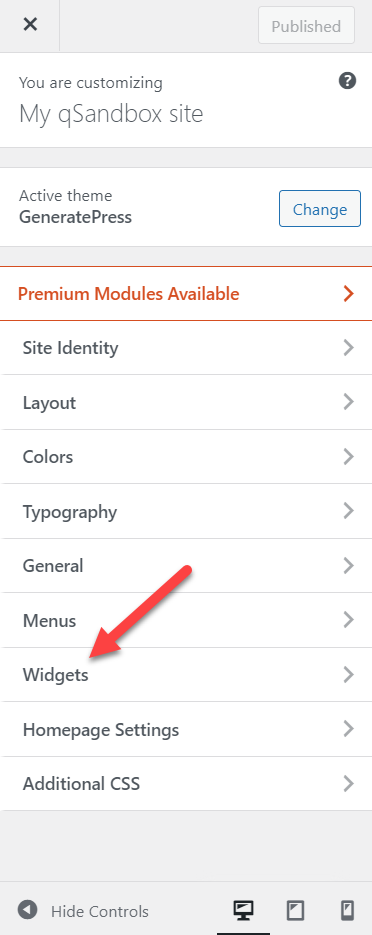
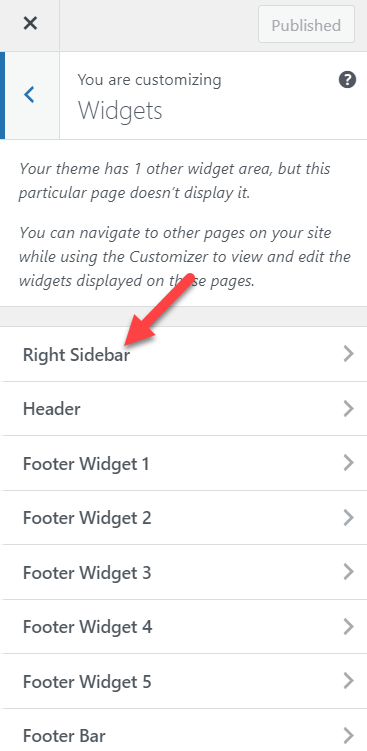
You will see all the widget areas. Select where you want to display the posts. Following the same example, we'll select the Right Sidebar widget.
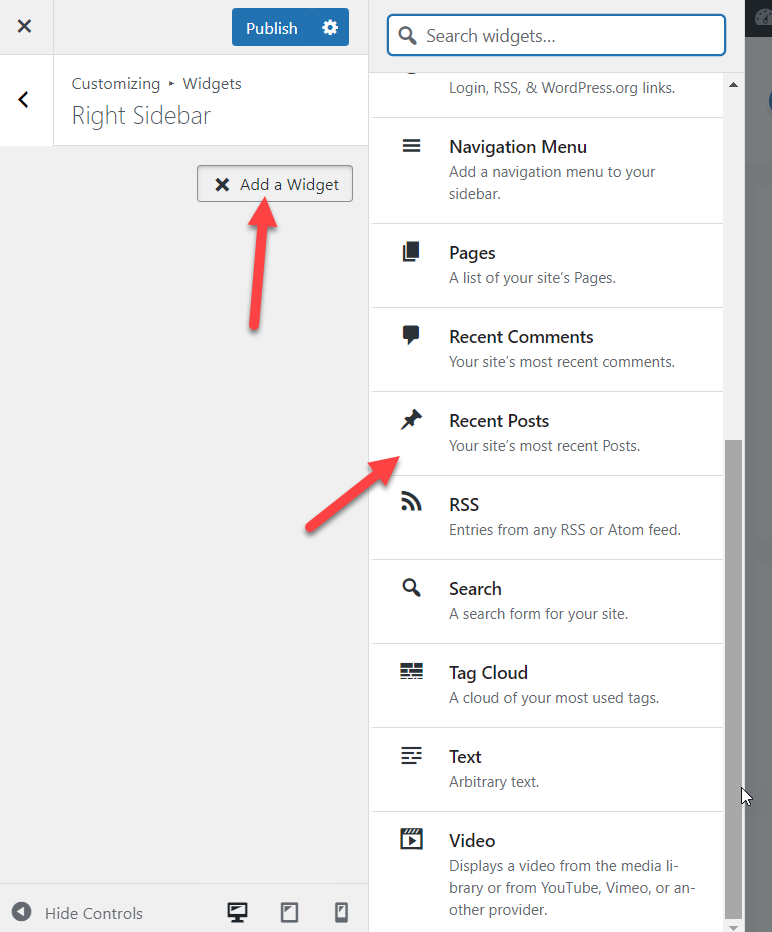
Click the + Add a Widget button to add new widgets and select the Recent Posts widget from the list.
Fill in the title, the number of posts to show and decide whether you want to display the post date, and publish the updates.
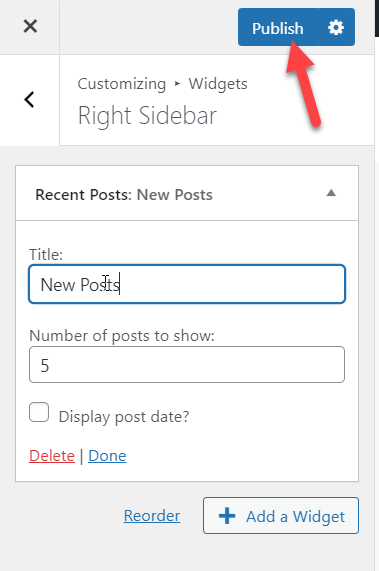
That's it! This way you can display posts in your sidebar using the WordPress Customizer.
Conclusion
In summary, adding posts to a page in WordPress is an excellent way to customize your site and give your posts more visibility. This way, you can provide users with useful information, improving navigation, and keeping them longer on your website.
In this guide, we've seen different methods to include your blog posts on a page. The most popular method is to set up custom home and blog pages. Additionally, you can use the Gutenberg editor block or plugins to embed the recent posts and create a list of posts.
We've also seen different ways to customize the posts page and two methods to add posts to your site's sidebar.
Have you found this post helpful? What have you learned? Is there anything else we should add? Let us know in the comments section below!
Wordpress Add Posts To Page
Source: https://quadlayers.com/add-posts-to-a-page-in-wordpress/
Posted by: godinthemot.blogspot.com

0 Response to "Wordpress Add Posts To Page"
Post a Comment