

how to cut out hair in photoshop
How to Use Select and Mask to extract something from its background in Photoshop CC 2015.5
Note: If you are using Photoshop CS6 or earlier use this tutorial
One of the most popular tasks in photoshop is removing something from its background, extracting, masking, floating, whatever you choose to call it. Up until now, the quick select brush and refine edge have been the tools of choice for most of the work. If you are on CS6 or earlier versions, this is still your best choice. However, if you are on Photoshop CC, as of today, it's a new day. The new Select and Mask space provides dramatically better results than refine edge. Watch this video and then read a bit more about it.
Adobe has been hard at work with the Select and Mask space. This tool allows you to quickly make selections based on similar colors and textures as well as detecting the edges of objects. You can begin with the Quick Select brush, like you always have, or, you can start in Select and Mask, by choosing a selection tool and clicking Select and Mask from the tool options bar.
You will notice, that it looks similar to refine edge, but it's much better.
- Either start with a selection, or choose a selection tool and choose Select and Mask from the options bar
- Choose the Onionskin mode (all new) and begin to paint on your subject (O key).
- If you move the opacity slider, you can choose a balance between the original image and the current selection. Find the perfect balance, so you can see the areas that are yet to be selected.
- Check on the black and white mask (K key) to make sure you haven't left any bits out.
- Use the Refine Edge Brush to go over any hair and edges. The more you refine the selection, the smarter it gets and the whole edge begins to look better.
- Choose a radius and see if it helps clean up the selection, Test it against Black (A key) and white (T key) and see if it looks good.
- If you are working with fine detail like hair, you will probably see that fringing around the edges, you know, when it's too light or dark. This was a pain to fix. I say, was, because now, all you need to do it click on Decontaminate Colors (It's actually works on more than just green screen spill now).
- Choose your output method, New Layer with Layer Mask is my favorite (because you can continue to work in the mask later, if you desire).
And bingo, a perfect selection!
Here are the commands on the Global Refinement tools and what they do:

- Smooth: This reduces the ragged edges and smooths them out, just like rubbing sandpaper over rough wood to create a smooth finish. Only use it if there are visible jaggies because it reduces the accuracy of the selection
- Feather: Creates a soft edge. If your image has softer edges this will add a more realistic result. It will cause the selection to blend into the new background smoothly. Only use this if you need to and if you do, keep the amount low, or it will look very fake.
Pro tip: Look at overlapping parts of the photo, such as when the model's arm crosses her body to see the exact amount of feather that should be used. Blurring occurs with wide apertures in lenses and should be matched for a believable result. - Contrast: This will cause semi-transparent areas to be forced to a solid opaque or transparent. Good for solid edges, but also useful at times for water, glass, smoke and hair.
- Shift Edge: this will cause the entire edge to grow or shrink (exactly that same result as select>grow or select>contract). This is good for when there is a halo around the edge, you can choke (or shrink) the mask to bypass those edges.
Here are more resources on selections and masks and extracting
Photoshop CC Selection Secrets
New Course by Colin Smith
Stop struggling with selections. Learn how to select and cut out anything from people, hair, trees, complex shapes and even transparency.
Discover how to get perfect edges, without halos and jaggies. Colin shows you exactly how in 18 lessons.
All the images are included for you to follow along.
You will be able to select and cut out anything: faster and cleaner.
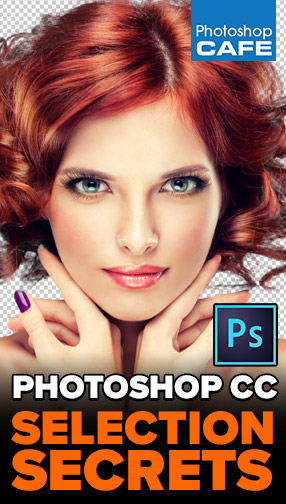
More info here
FreeTutorials
- Selecting Impossible Images
- Using Refine Edge
In Depth Premium training
- Sky City Project: Compositing in Photoshop
- Photoshop Compositing Secrets
Check out the rest of the new features in Photoshop CC 2015.5 on the superguide here

Thanks for checking this out!
See you at the CAFE
Colin
Adobe Superguide
All the Adobe information and more is available as a PDF magazine called the CS6 Superguide. If you're on our list, you will receive it free by email as soon as it's available. If not, sign up now and get the CS6 Superguide for free. Or click the image below.
Learn Photoshop, inside out! Photoshop CC For Digital Photographers video.
Check it out.
more related tutorials
how to cut out hair in photoshop
Source: https://photoshopcafe.com/tutorials/how-to-cut-our-hair-in-photoshop-cc-tutorial/
Posted by: godinthemot.blogspot.com
0 Response to "how to cut out hair in photoshop"
Post a Comment